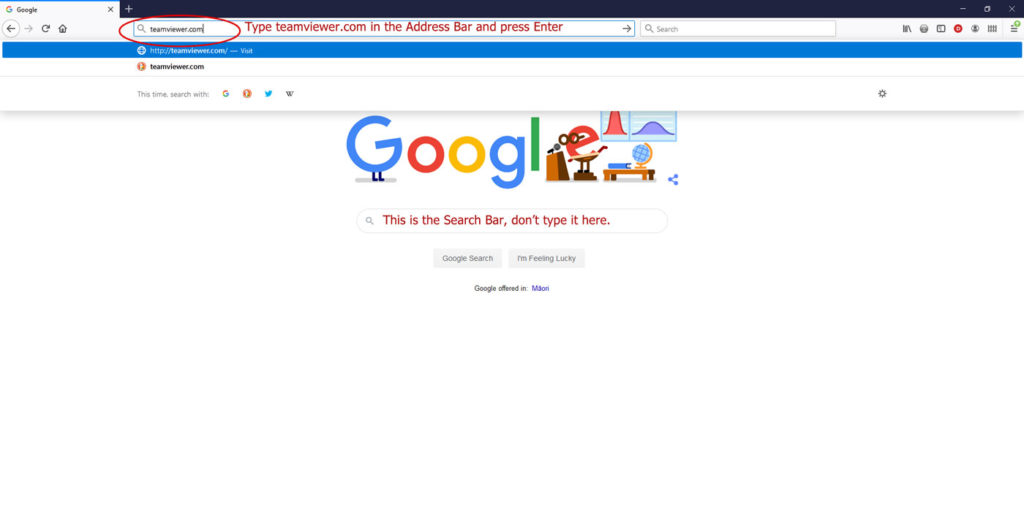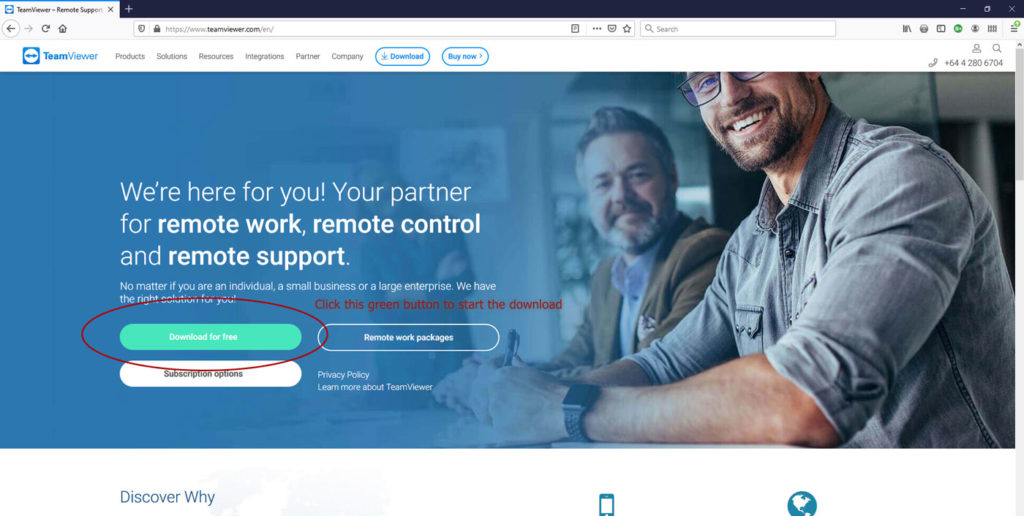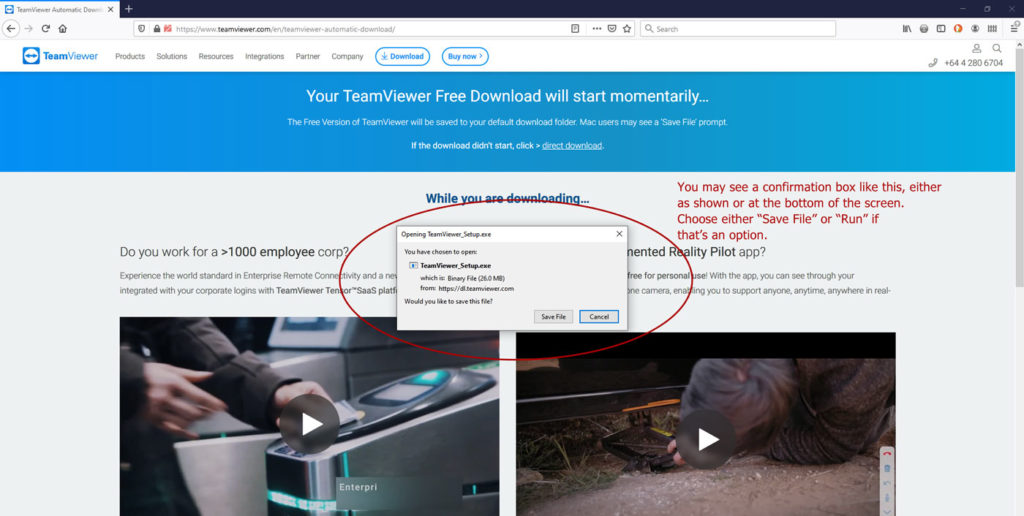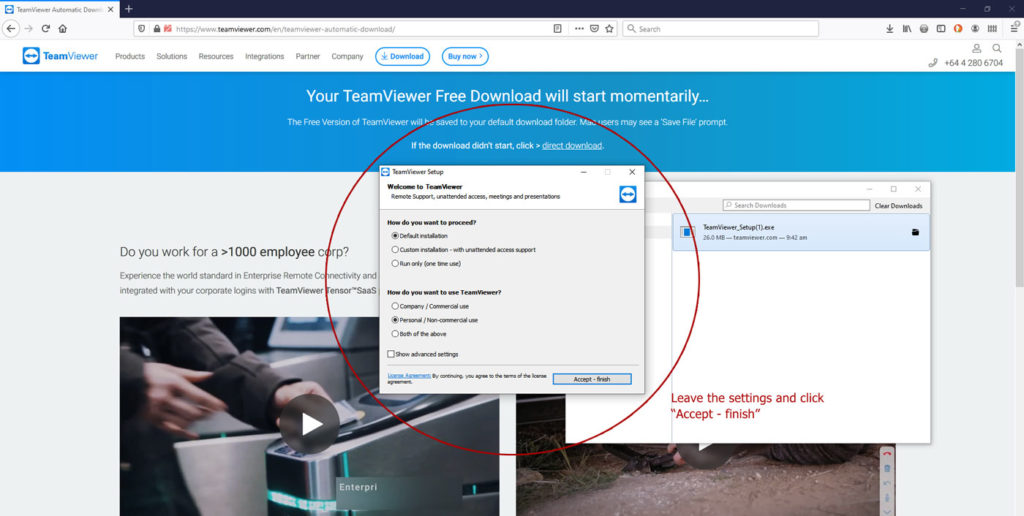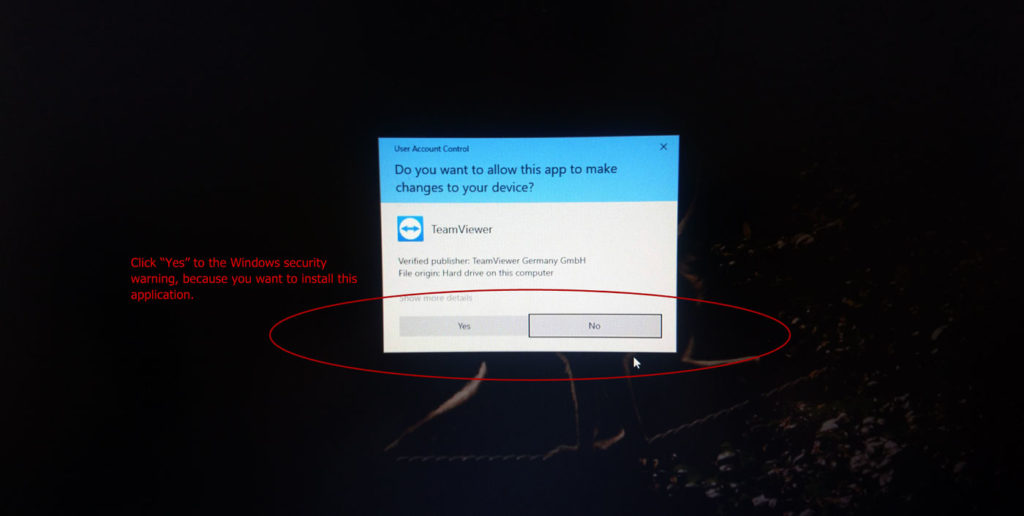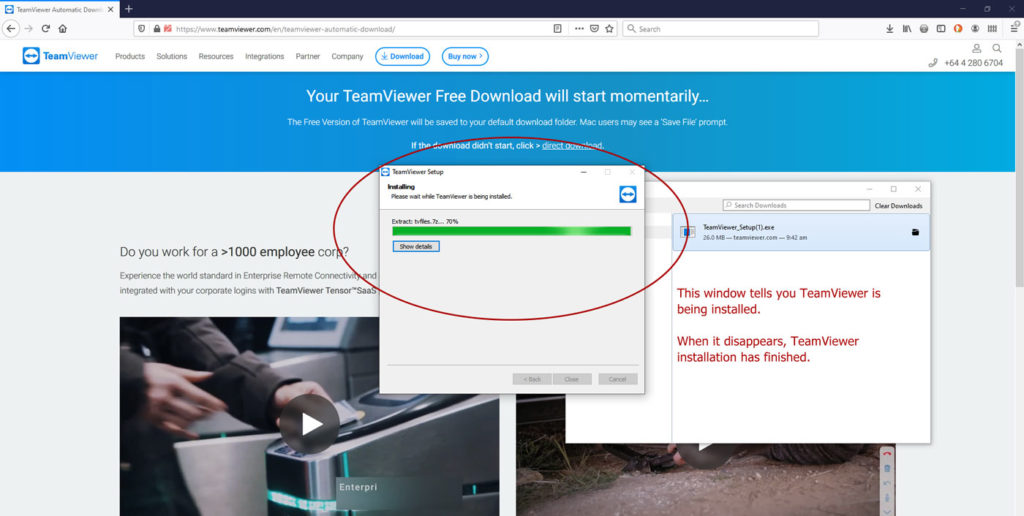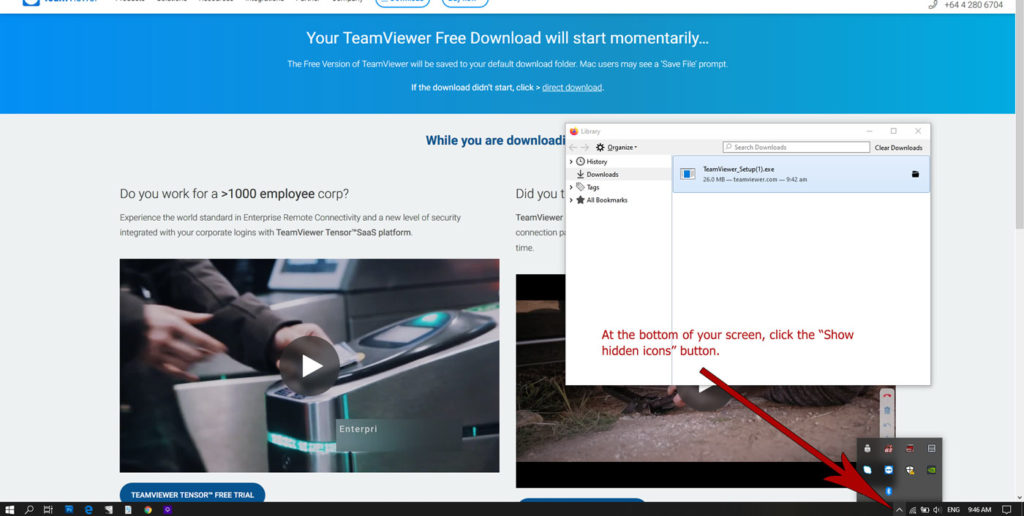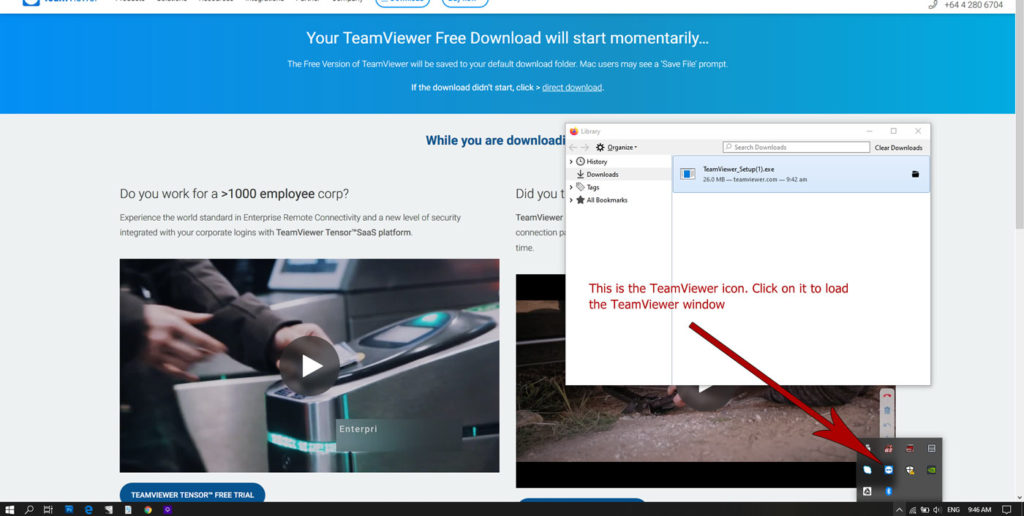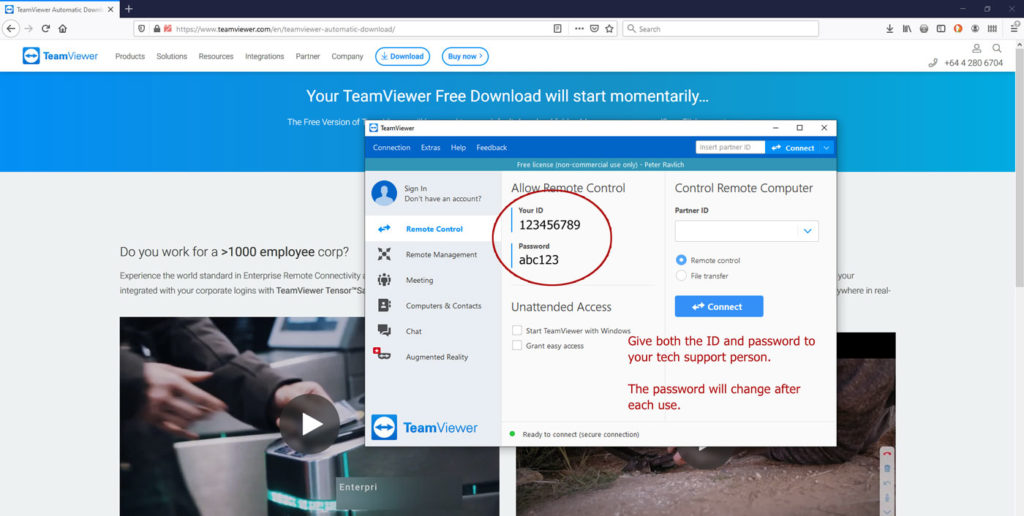
A quick tutorial on installing Remote Access applications, which let IT support staff help you fix software problems without a site visit.
This walkthrough demonstrates the installation of TeamViewer, one of the more popular choices at present, but a similar process applies to ShowMyPC and other common options.
Security note: These applications are designed to give temporary access to your PC to trusted contractors, and allow them to make changes to your files and system. Only install recommended apps when advised to do so, and do not give your ID or password to anyone else.
The password will change between sessions, so your support provider will only have access when you grant it.
The following walkthrough is only required the first time you install TeamViewer, or when an update is necessary. After installation, only the final two steps are necessary to prepare a session.
The walkthrough uses Firefox 7.4, but the steps have been generalised for Edge and Chrome. Note that a few colours and layout details may differ, depending on your local themes, resolution, and display options.
Click on the first image to start the walkthrough. You can use the arrow keys on your keyboard or at the top left of the images to step through the slideshow.
Once you have completed Step 9, your support person will be able to begin a session, and you will be able to observe as they work on diagnosing your PC or fixing your issue.
Try not to use the mouse or keyboard while they work on your system, unless asked to. There can be a slight delay between what you see on the screen and what they see on theirs, so you’ll both need a little patience if you’re talking through a problem or trying to demonstrate broken software.
Credit: Banner Photo by Andrew Neel from Pexels

